Click on the 2Respond to edit. Then click the ![]() button to open the activity:
button to open the activity:

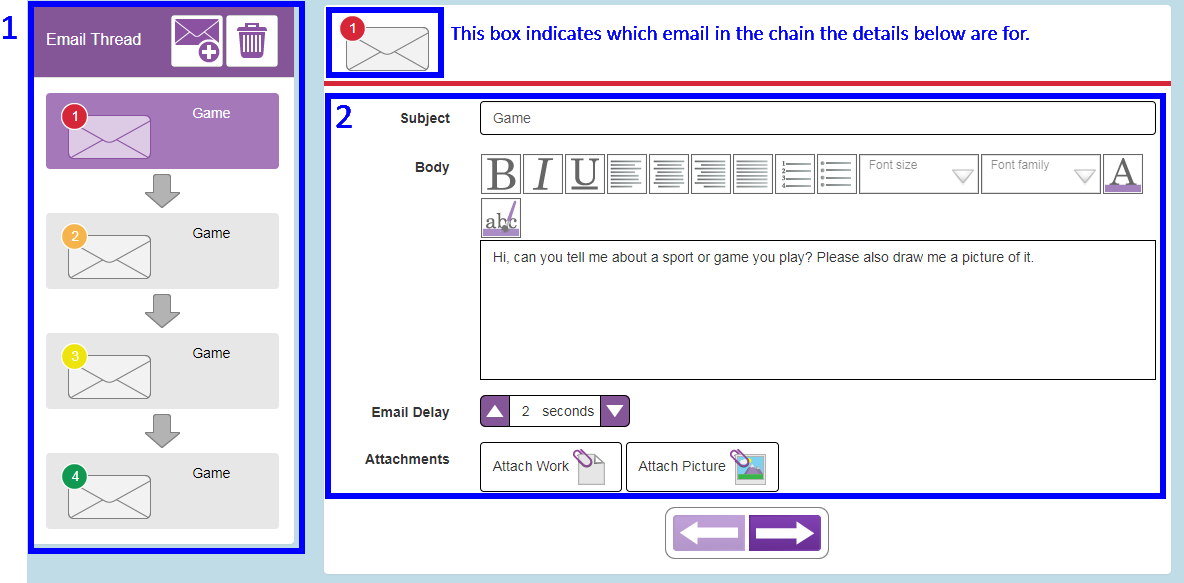
Box 1: This contains the chain of emails within the 2Respond.
| • | To edit an individual email, click on it and see the notes for Box 2 |
| • | To remove an email from the chain, click on it and then on the |
| • | To add an email to the chain, click on the position in the chain before the new email and click on the |
Box 2: This shows the content of the selected email in the chain. Edit the following components:
| • | Email Subject |
| • | Email message including formatting options |
| • | Email Delay; this is a delay between the child responding to this mail and the next mail in the chain being sent. This makes the simulation of an email conversation more realistic. |
| • | Attachments; add or remove work or picture attachments. |
Other Settings
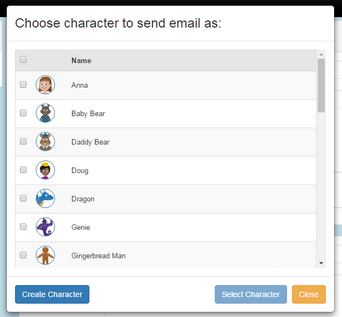
Click on the ![]() button to select who the emails will appear to be sent by and the icon that will appear in the online work folder for this 2Respond and in children 2Dos.
button to select who the emails will appear to be sent by and the icon that will appear in the online work folder for this 2Respond and in children 2Dos.
There are some example senders, to use one of these tick the tick box next to their name and then click the 'Select Character' button.

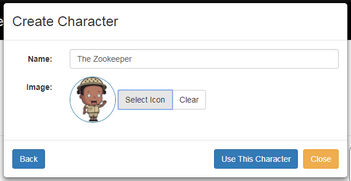
Alternatively, create a character by clicking on the 'Create Character' button and creating a character by selecting clip art, uploading an image from the device or by drawing an image using the paint tools.

Enter a Name for the character and click on the Select Icon button. This opens the same Clip-art picker screen. From here either:
| • | Use the drop-down box to select an appropriate clip art category and then an appropriate image. |
| • | Click the |
| • | Click the |
Click on the 'Create and Use this character' button to finish.
Saving
Save to a Purple Mash folders. The 2Respond can then be set as a 2Do. See Setting 2Responds for children. Saving will not overwrite the in-built 2Respond activities in Purple Mash.